Working on my local Ubuntu 20.04 installation, I will set up a development environment and implement Symfony authentication with LDAP.

Citing from the the documentation I’m interested in this scenario:

Checking a user’s password against an LDAP server while fetching user information from another source (database using FOSUserBundle, for example).

Setup Symfony and create new project as per symfony.com/download:

# Make sure you have PHP extensions we will use and ldapsearch.
sudo apt install php-ldap php-sqlite3 ldap-utils

# Create new Symfony project.
symfony new ldap_test --version=5.4 --full
cd ldap_test
composer require symfony/ldap

To make it simple, I will use sqlite to store the user records, just uncomment in .env:

DATABASE_URL="sqlite:///%kernel.project_dir%/var/data.db"

Create user entity. Answer with all defaults just for “Does this app need to hash/check user passwords?” I said no.

php bin/console make:user
php bin/console make:migration
php bin/console doctrine:migrations:migrate

Create controller from a template:

php bin/console make:controller Protected

In config/packages/security.yaml make the firewall to protect the access to our newly created action:

    access_control:
        - { path: ^/protected, roles: ROLE_USER }

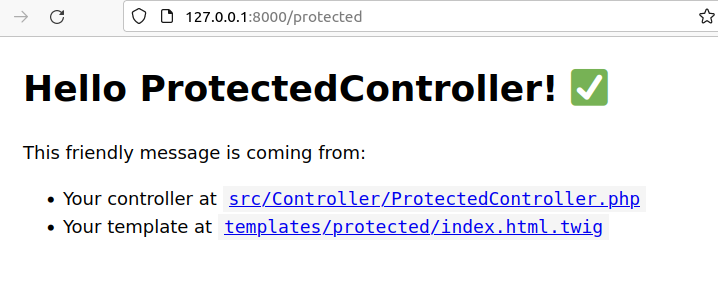
Run the server and make sure that the access to http://127.0.0.1:8000/protected is not allowed:

symfony_ldap_1

Let’s create sample user record in the database

sqlite> .schema user
CREATE TABLE user (id INTEGER PRIMARY KEY AUTOINCREMENT NOT NULL, email VARCHAR(180) NOT NULL, roles CLOB NOT NULL --(DC2Type:json)
);
CREATE UNIQUE INDEX UNIQ_8D93D649E7927C74 ON user (email);
sqlite> INSERT INTO user VALUES (NULL,'test@example.invalid','[ROLE_USER]');

We will use Apache Directory Studio to run local LDAP server. Download it from (directory.apache.org/studio/downloads.html)[https://directory.apache.org/studio/downloads.html], extract and run.

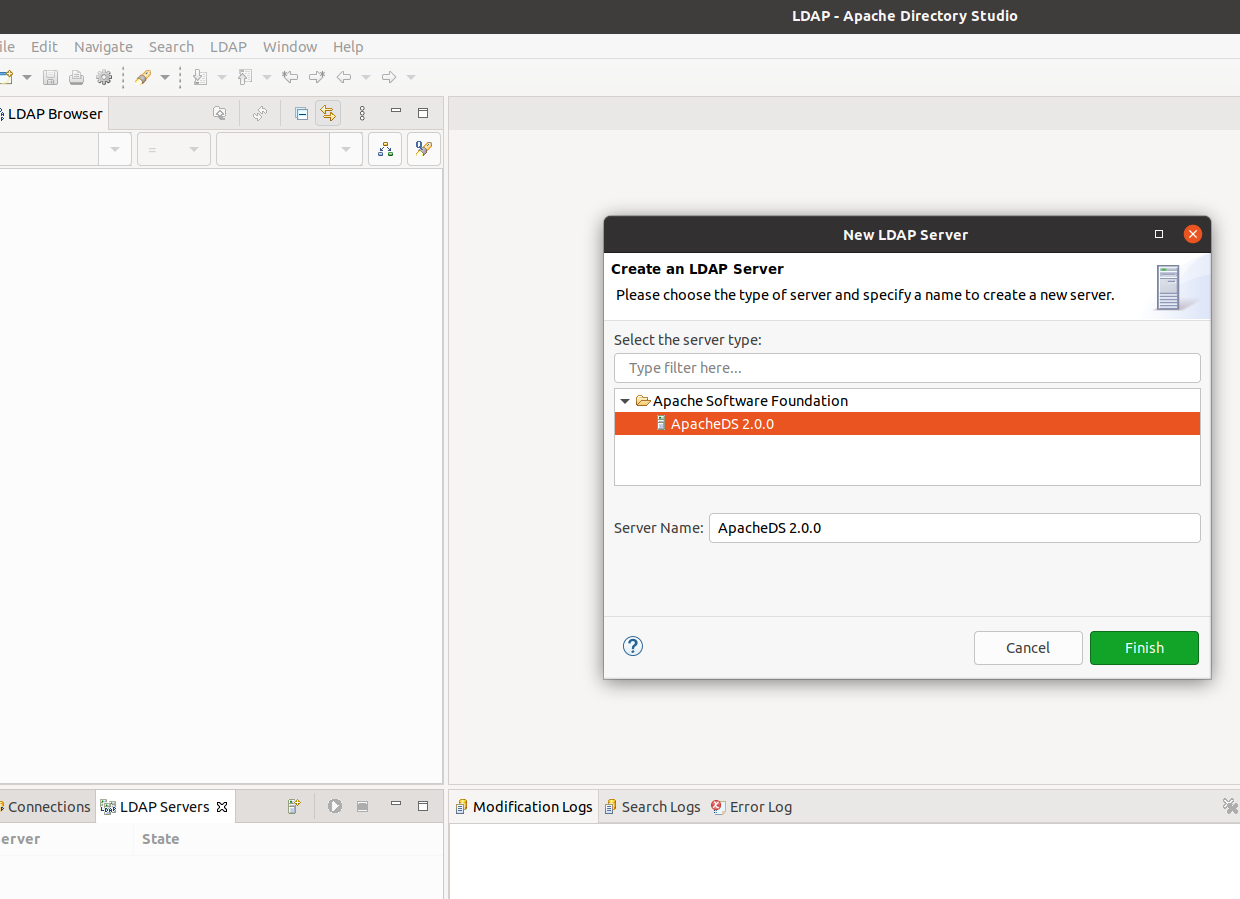
Click on the “LDAP servers” tab, create new server.

symfony_ldap_2

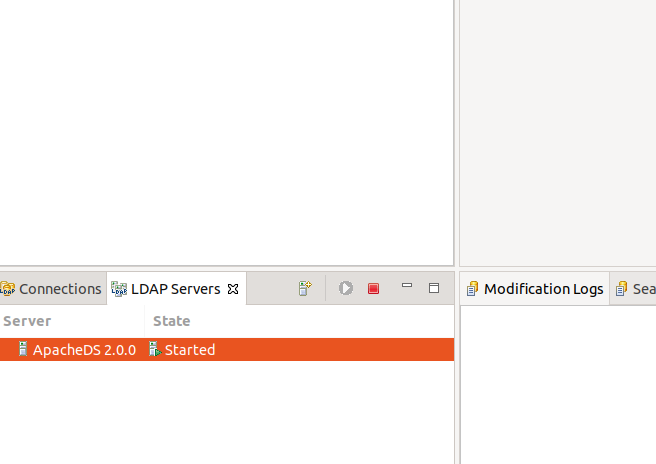
Then start it.

symfony_ldap_3

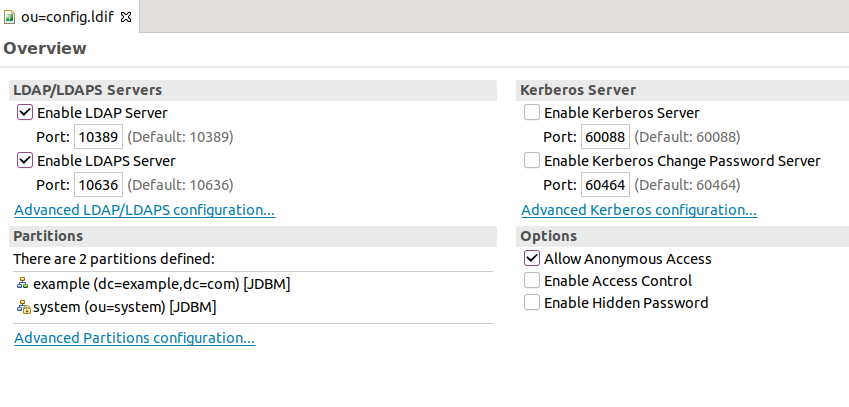
When you double-click it, you can see that its running on port 10389:

symfony_ldap_4

Right click it and “Create a connection”. Let’s create sample user. Download Sample LDAP LDIF file. In LDAP browser tab, right-click the root node, select import and choose the file.

Let’s test the connection using ldapsearch:

$ ldapsearch -H ldap://localhost:10389 -D 'cn=test@example.invalid,dc=example,dc=com' -w xyz sn=Muras
# extended LDIF
#
# LDAPv3
# base <> (default) with scope subtree
# filter: sn=Muras
# requesting: ALL
#

# Tomek Muras, example.com
dn: cn=Tomek Muras,dc=example,dc=com
mail: test@example.invalid
sn: Muras
cn: Tomek Muras
objectClass: top
objectClass: inetOrgPerson
objectClass: person
objectClass: organizationalPerson
userPassword:: e1NTSEF9WmtQNm9NTGFTK1hiZ2c5RG1WODg4T2FmaktUTXhCNkpGSEVrUWc9PQ=
=
uid: tmuras

# search result
search: 2
result: 0 Success

# numResponses: 2
# numEntries: 1

Add login form, as per symfony.com/doc/5.4/security.html. I have put login action in the same ProtectedController:

    /**
     * @Route("/login", name="login")
     */
    public function login(AuthenticationUtils $authenticationUtils): Response
    {
        // get the login error if there is one
        $error = $authenticationUtils->getLastAuthenticationError();

        // last username entered by the user
        $lastUsername = $authenticationUtils->getLastUsername();

        return $this->render('protected/login.html.twig', [
            'last_username' => $lastUsername,
            'error' => $error,
        ]);
    }

Create service in Symfony, based on symfony.com/doc/5.4/security/ldap.html, add to config/services.yaml:

    Symfony\Component\Ldap\Ldap:
        arguments: ['@Symfony\Component\Ldap\Adapter\ExtLdap\Adapter']
        tags:
            - ldap
    Symfony\Component\Ldap\Adapter\ExtLdap\Adapter:
        arguments:
            -   host: localhost
                port: 10389
                encryption: false
                options:
                    protocol_version: 3
                    referrals: false

Update config/packages/security.yaml:

security:
  enable_authenticator_manager: true
  # https://symfony.com/doc/current/security.html#registering-the-user-hashing-passwords
  password_hashers:
    Symfony\Component\Security\Core\User\PasswordAuthenticatedUserInterface: 'auto'
  # https://symfony.com/doc/current/security.html#loading-the-user-the-user-provider
  providers:
    # used to reload user from session & other features (e.g. switch_user)
    app_user_provider:
      entity:
        class: App\Entity\User
        property: email
  firewalls:
    dev:
      pattern: ^/(_(profiler|wdt)|css|images|js)/
      security: false
    main:
      lazy: true
      provider: app_user_provider

      form_login_ldap:
        service: Symfony\Component\Ldap\Ldap
        dn_string: 'cn={username},dc=example,dc=com'
        login_path: login
        check_path: login

  # Easy way to control access for large sections of your site
  # Note: Only the *first* access control that matches will be used
  access_control:
    - { path: ^/protected, roles: ROLE_USER }

Now we can access the protected resource, once valid LDAP password is entered:

symfony_ldap_5

The relevant logs during the login:

[PHP        ] [Sun Dec 12 16:03:34 2021] 127.0.0.1:39400 Accepted
[PHP        ] [Sun Dec 12 16:03:34 2021] 127.0.0.1:39400 [302]: POST /login
[PHP        ] [Sun Dec 12 16:03:34 2021] 127.0.0.1:39400 Closing
[PHP        ] [Sun Dec 12 16:03:34 2021] 127.0.0.1:39404 Accepted
[Web Server ] Dec 12 16:03:34 |INFO   | SERVER POST (302) /login host="127.0.0.1:8004" ip="127.0.0.1" scheme="https"
[Web Server ] Dec 12 16:03:34 |INFO   | SERVER GET  (200) /protected 
[PHP        ] [Sun Dec 12 16:03:34 2021] 127.0.0.1:39404 [200]: GET /protected
[PHP        ] [Sun Dec 12 16:03:34 2021] 127.0.0.1:39404 Closing
[PHP        ] [Sun Dec 12 16:03:34 2021] 127.0.0.1:39406 Accepted
[PHP        ] [Sun Dec 12 16:03:34 2021] 127.0.0.1:39406 [200]: GET /_wdt/f011c6
[Web Server ] Dec 12 16:03:34 |INFO   | SERVER GET  (200) /_wdt/f011c6 ip="127.0.0.1"
[PHP        ] [Sun Dec 12 16:03:34 2021] 127.0.0.1:39406 Closing
[Application] Dec 12 16:03:34 |INFO   | REQUES Matched route "login". method="POST" request_uri="http://127.0.0.1:8000/login" route="login" route_parameters={"_controller":"App\\Controller\\ProtectedController::login","_route":"login"}
[Application] Dec 12 16:03:34 |DEBUG  | SECURI Checking for authenticator support. authenticators=1 firewall_name="main"
[Application] Dec 12 16:03:34 |DEBUG  | SECURI Checking support on authenticator. authenticator="Symfony\\Component\\Ldap\\Security\\LdapAuthenticator"
[Application] Dec 12 16:03:34 |DEBUG  | DOCTRI SELECT t0.id AS id_1, t0.email AS email_2, t0.roles AS roles_3 FROM user t0 WHERE t0.email = ? LIMIT 1 0="test@example.invalid"
[Application] Dec 12 16:03:34 |INFO   | PHP    User Deprecated: Since symfony/ldap 5.3: Not implementing the "Symfony\Component\Security\Core\User\PasswordAuthenticatedUserInterface" interface in class "App\Entity\User" while using password-based authenticators is deprecated. 
[Application] Dec 12 16:03:34 |INFO   | PHP    User Deprecated: Since symfony/security-http 5.3: Not implementing the "Symfony\Component\Security\Core\User\PasswordAuthenticatedUserInterface" interface in class "App\Entity\User" while using password-based authentication is deprecated. 
[Application] Dec 12 16:03:34 |INFO   | SECURI Authenticator successful! authenticator="Symfony\\Component\\Security\\Http\\Authenticator\\Debug\\TraceableAuthenticator" token={"Symfony\\Component\\Security\\Core\\Authentication\\Token\\UsernamePasswordToken":"UsernamePasswordToken(user=\"test@example.invalid\", authenticated=true, roles=\"ROLE_USER\")"}
[Application] Dec 12 16:03:34 |DEBUG  | SECURI The "Symfony\Component\Security\Http\Authenticator\Debug\TraceableAuthenticator" authenticator set the response. Any later authenticator will not be called 
[Application] Dec 12 16:03:34 |DEBUG  | SECURI Stored the security token in the session. key="_security_main"

The full code is available on github.com/tmuras/symfony-ldap-authentication.


I have a file sql.gz that is a big MySQL dump, so I do not want to extract it when importing.

I would also like to execute a command before the dump get’s imported. In my case I want to disable binary logging for the session:

SET sql_log_bin = 0;

Here is how this may be done in shell:

{ echo 'SET sql_log_bin = 0;' ; gzip -dc sql.gz ; } | mysql

I didn’t test it with huge sql.gz files, I’m not sure if the performance is different than executing gzip -dc sql.gz directly.


atop is an extremely useful top-like utility that shows the current state of the system.

To try it out run “atop” and review its different output modes by pressing: m (memory), d (disk), n (network), s (scheduling), v (various), c (command line), u (per user), p (per program), y (toggle threads).

On top of its interactive, top-like (but top on steroids!) functionality, atop can capture (log) system state snapshots and then review them.

To start the recording use -w option with a file name and then the interval (in seconds) for each refresh, i.e.:

atop -w log.atop 1

Later on, read the data from the log file:

atop -r log.atop

Jump one interval forward by pressing “t”, to go backward press “T”. To jump to a specified time, press “b”.

Ubuntu package contains atop.service which will log the samples into /var/log/atop/atop_YYYYMMDD log files with interval 600.


How to set-up reliable autossh tunnel in Ubuntu 20.10

Client

The idea is that a machine hosted anywhere - i.e. behind the NAT, with no public IP - will establish SSH tunnel to publicly available server. The only required connectivity is access to the server IP & port.

First install autossh and generate public/private keys.

apt install autossh
ssh-keygen

Let’s say that:

  • The public server that runs SSH client is available at server.muras.eu.
  • It has SSH available externally on port 10001
  • Internally SSH is running on standard port 22
  • There is a user tunnel that we will use to authenticate SSH session

Create /etc/systemd/system/autossh.service with the content below.

[Unit]
Description=AutoSSH to My Server
After=network.target

[Service]
Environment="AUTOSSH_GATETIME=0"
ExecStart=/usr/bin/autossh -N -M 0 -o "ExitOnForwardFailure=yes" -o "ServerAliveInterval=180" -o "ServerAliveCountMax=3" -o "PubkeyAuthentication=yes" -o "PasswordAuthentication=no" -i /root/.ssh/id_rsa -R 6668:localhost:22 tunnel@server.muras.eu -p 10001
Restart=always

[Install]
WantedBy=multi-user.target

Then enable the service and reboot to make sure it works automatically.

systemctl enable autossh
reboot

Server

Create user tunnel that has no interactive shell session (-s /bin/false) but create its home directory (-m).

useradd -d /home/tunnel -s /bin/false -m tunnel

Add to /home/tunnel/.ssh/authorized_keys the public key of the root user from our client (/root/.ssh/id_rsa.pub )

no-pty,no-X11-forwarding,permitopen="localhost:6668",command="/bin/echo do-not-send-commands" ssh-rsa abcdef....

Connection

To access client machine, login to server and run:

ssh -p 6668 tunnel@127.0.0.1

How to install Pi-hole on Raspberry Pi 4 with Ubuntu server

Hardware

Hardware used:

  • Rapberry Pi 4, 2GB
  • MicroSD card, 16 GB

Write an image to the microSD card

I’m using Raspberry Pi Imager and the OS I’ve chosen is Ubuntu Server 20.10 64 bit for ARM.

Insert microSD card, connect Raspberry Pi to your network, SSH

After plugging Raspberry Pi into my local network, it will receive a dynamic IP fom my DHCP server. I will find it by using nmap to scan my network. I’m looking for a PC with only SSH port open:

$ nmap 192.168.0.0/24  
Starting Nmap 7.80 ( https://nmap.org ) at 2020-11-08 14:08 CET
...
Nmap scan report for 192.168.0.127
Host is up (0.00035s latency).
Not shown: 999 closed ports
PORT   STATE SERVICE
22/tcp open  ssh
...

Now connect to RaspberryPI and go through the initial setup. The default user and password is ubuntu/ubuntu - you will be required to change it.

$ ssh ubuntu@192.168.0.127                                        
The authenticity of host '192.168.0.127 (192.168.0.127)' can't be established.
ECDSA key fingerprint is SHA256:b2CSqjpH1ZE4IkxntnihASzpxZQ1Hne3VUJoLWNyQ0w.
Are you sure you want to continue connecting (yes/no/[fingerprint])? yes
Warning: Permanently added '192.168.0.127' (ECDSA) to the list of known hosts.
ubuntu@192.168.0.127's password: 
You are required to change your password immediately (administrator enforced)
....

Install pi-hole

Following pi-hole documentation install it. Follow the installer.

curl -sSL https://install.pi-hole.net | bash

Note the password given at the end of the process, ie:

 Your Admin Webpage login password is H7uEWl7- 

Reboot

sudo reboot

Login to web interface, configure

Login to web interface using static IP assigned during the installation.

Go to group management -> Adlist and (optionally) change the default list of hosts - from https://raw.githubusercontent.com/StevenBlack/hosts/master/hosts into another one, if you want to filter more:

https://github.com/StevenBlack/hosts

Then rebuild the database under Tools -> Update Gravity

Set up your local router

Setup your router (DHCP server) to point to the static IP of your pi-hole as a DNS server.


Using Pressure Stall Information (PSI) to find performance bottleneck

PSI stands for Pressure Stall Information and it’s an alternative to Linux load statistic that gives an insight into how and why your system is busy.

We will use it to identify where is a performance bottleneck in my web application - Moodle. My environment is a single server running Ubuntu 20.04 with PHP, Apache, MySQL and Redis.

I have run a jmeter test that emulates login and forum post by a number of users. While running the tests, I’m capturing load and pressure information:

while true; do echo $(cat /proc/loadavg | cut -d ' ' -f1),$(cat /proc/pressure/cpu  | cut -d' ' -f2 | cut -d= -f2),$(grep some /proc/pressure/io | cut -d' ' -f2 | cut -d= -f2),$(grep some /proc/pressure/io | cut -d' ' -f2 | cut -d= -f2)   >> monitor.csv; sleep 10; done

The results of the first run are:

Starting standalone test @ Sat Oct 17 17:22:54 CEST 2020 (1602948174177)
...
summary =    560 in 00:04:10 =    2.2/s Avg: 10655 Min:    74 Max: 32890 Err:     0 (0.00%)
Tidying up ...    @ Sat Oct 17 17:27:04 CEST 2020 (1602948424452)

psi_cpu_bottleneck1

The load jumps up to 30 and CPU pressure reaches 99%. It means that at some point, 99% of the processing was not happening, because the processes waited for CPU to be available. It’s clearly a bottleneck on the CPU side. The low pressure numbers on the I/O side confirm that (I’m not even showing them on the graph as they are close to 0).

Now - let’s put the data on a slow filesystem. I’m using nbd + trickle for emulating slow storage.

apt-get install nbd-client nbd-server trickle
modprobe nbd
trickle -d 100 -u 100 -v nbd-server -d
nbd-client -N test  127.0.0.1 /dev/nbd0
mount -o sync /dev/nbd0 /mnt/nbd

The result is the same:

Starting standalone test @ Sat Oct 17 18:15:21 CEST 2020 (1602951321747)
...
summary =    560 in 00:04:10 =    2.2/s Avg: 10281 Min:    73 Max: 31974 Err:     0 (0.00%)
Tidying up ...    @ Sat Oct 17 18:19:32 CEST 2020 (1602951572190)

But this time we see higher utilization of the I/O - pressure number reaches 70%.

psi_cpu_bottleneck2

Let’s push it further and slow down the storage even more. This time we see a significant drop in the performance (from 2.2 to 0.7 requests per second) .

Starting standalone test @ Sat Oct 17 18:30:16 CEST 2020 (1602952216410)
...
summary =    560 in 00:13:13 =    0.7/s Avg: 33207 Min:    68 Max: 380378 Err:     0 (0.00%)
Tidying up ...    @ Sat Oct 17 18:43:30 CEST 2020 (1602953010187)

psi_io_bottleneck

The CPU pressure is lower and full pressure I/O reaches 99%. This time the bottleneck is clearly on the I/O side.

Note that the information of CPU vs I/O is clearly visible when using PSI. The standard “load” information is not enough to distinguish between those two.

You can see PSI information with tools like “atop”.


Moodle’s performance information and events

Moodle’s performance information (can be enabled in Site administration -> Development -> Debugging) is very useful for troubleshooting your site performance. Sometimes just one look there will tell you where the (performance) problem is. But sometimes not.

The limitation of the current implementation is that the time and resources used by event-triggered logging action are not taken into account.

Consider the following Moodle page:

<?php
require_once('config.php');

$PAGE->set_context(context_system::instance());
$PAGE->set_url('/log.php');

$event = \core\event\user_login_failed::create(
           ['other' => ['username' => 'Test','reason' => 'No reason!']]
         );
$event->trigger();

echo $OUTPUT->header();
echo $OUTPUT->footer();

See the sample footer with the performance information:

Moodle_performance_information_footer

It tells us that there were no DB writes performed. This can not be true, because there was a new row added to in mdl_logstore_standard_log table.

Let’s check if the time spent by the logging function is covered. I have edited function insert_event_entries in admin/tool/log/store/standard/classes/log/store.php - injected sleep(10); there:

    protected function insert_event_entries($evententries) {
        global $DB;

        sleep(10);
        $DB->insert_records('logstore_standard_log', $evententries);
    }

After refresh - the information from the footer does not change! Moodle tells me it took 0.133499 secs to generate it, while it obviously took more than 10 seconds. Browser debugger confirms it:

Moodle_performance_information_browser

I have logged that in Moodle tracker MDL-68817.


How does the session locks work in Moodle (part 3)?

The problem with the session locks is that it may often cause the performance issues for the end users. Imagine that a teacher runs some complicated report. The report generation takes more than one minute. After just few seconds, the teacher gets bored and opens the course page in a new tab instead of waiting for the report. Loading the course page takes forever - this is because the web server has locked the session for the report generation. End-user experience is poor - they will complain that course loading page took a long time (and it did - even though the root reason for this was poor performing custom report).

Triggering \core\session\manager::write_close() will help a bit - we release the lock as soon as we can.

But we can go one step further here - mark some scripts (pages) as no needing the session lock at all. That is a new feature in Moodle 3.9 - READ_ONLY_SESSION implemented in MDL-58018. We promise here that the script will not write to the session.

We do it by declaring READ_ONLY_SESSION before including config.php:

define('READ_ONLY_SESSION', true);
require_once("config.php");

echo "Time start: " . date("H:i:s") . "<br />";
sleep(5);
echo "Time end: " . date("H:i:s") . "<br />";

The pre-requisites for the read only sessions are:

  • Enable in config.php by setting:
$CFG->enable_read_only_sessions = true;
  • Change sessions handling to DB. At the moment read only sessions are implemented for DB, Redis and memcached. The work on adding the support for file-bases sessions continues in MDL-68522.

After running page1.php and page2.php one by one, I get the results:

Time start: 17:20:53
Time end: 17:20:58
Time start: 17:20:54
Time end: 17:20:59

No lock at all! The second script started running as soon as my request was received.

The new functionality is currently used in 2 places:

  • lib/ajax/getnavbranch.php - no need to wait for the session lock just to get the navigation menu entries.
  • lib/ajax/service.php - the script starts with no session lock and will continue in this mode if the service being called has readonlysession set to true.

So - get the latest Moodle 3.9, enable $CFG->enable_read_only_sessions, use DB or Redis for your sessions and enjoy the benefits of no locking session calls.


How does the session locks work in Moodle (part 2)?

In part 1 we have learned how the session locks work in PHP. Now let’s apply it in the Moodle context.

We start with the simplest possible Moodle page. We only bootstrap Moodle, start, sleep for 5 seconds and finish.

I have created page1.php and page2.php both with the same content:

require_once("config.php");

echo "Time start: " . date("H:i:s") . "<br />";
sleep(5);
echo "Time end: " . date("H:i:s") . "<br />";

And then I have opened both in separate tabs. One after another. The results:

Time start: 17:21:50
Time end: 17:21:55
Time start: 17:21:55
Time end: 17:22:00

We can clearly see that the second script stated running only after the first one has finished. This is because Moodle has initiated the session while bootstraping. It happened when we included config.php.

Now let’s imitate the session_close() mechanism - in Moodle we can use manager::write_close():

require_once("config.php");

echo "Time start: " . date("H:i:s") . "<br />";
sleep(2);
core\session\manager::write_close();
sleep(3);
echo "Time end: " . date("H:i:s") . "<br />";

Now when I run both scrips:

Time start: 18:53:47
Time end: 18:53:52
Time start: 18:53:49
Time end: 18:53:54

I have launched both of them in the same second. This time my code in the second script started just 2 seconds after the first one.

Closing the session is used in Moodle in several places. For example the last lines of the code in file.php - a script that is used to send a file to user, are:

// ========================================
// finally send the file
// ========================================
\core\session\manager::write_close(); // Unlock session during file serving.
send_stored_file($file, null, $CFG->filteruploadedfiles, $forcedownload);

This makes sense - imagine what would happen if sending a big file for the download would keep the session locked! A teacher would not be able to access any other page while downloading that big PDF assignment file.

The default and simplest implementation of session and session locks in your LAMP stack is the default PHP implementation - which means file based sessions. Moodle overwrites the location of the PHP session files, and you can find them in moodle_data/sessions directory. This is implemented in \core\session\file class.

If I run page1.php and page2.php at the same time, and I know the name of the session file, I can interrogate it on the server side:

 sudo fuser sess_k8pm2bug3rkk93ldhvu47aih62 
/opt/data/vanilla39/sessions/sess_k8pm2bug3rkk93ldhvu47aih62:  9944  9953

 sudo lsof sess_k8pm2bug3rkk93ldhvu47aih62  
COMMAND  PID     USER   FD   TYPE DEVICE SIZE/OFF     NODE NAME
apache2 9944 www-data   13u   REG  259,6     4900 16132983 sess_k8pm2bug3rkk93ldhvu47aih62
apache2 9953 www-data   13uW  REG  259,6     4900 16132983 sess_k8pm2bug3rkk93ldhvu47aih62

fuser is showing me the IDs of the processes using the file. From lsof we can see that process 9953 has currently the session lock - as it has the writeable flag (W) set. So apache2 process 9944 must be waiting for the lock.

As administrator, you can go to “Site administration -> Server -> Session handling” and set “Use database for session information” (dbsessions). This will change the implementation of sessions to class:
\core\session\database

Now the session locks are handled by the database. Each driver will implement its own method, for example MySQL uses its RELEASE_LOCK() and PostgreSQL uses pg_advisory_lock() function.

There are other implementations of sessions, like memcached or redis. To switch to those, you need to configure $CFG->session_handler_class in config.php.

Have a look at the last part 3.