As a astronomy enthusiast, I really like the default screensaver that comes with gnome-screensaver, named “cosmos”. It’s nice but not ideal:

  • It has only few images
  • Images do not have any captions – it would be very nice to have even some description of what are you looking at

I’ve decided to create a similar screensaver but with other set of images. When the screensaver is ready, we will package it for Debian/Ubuntu as a .deb so other people can install it easily. A screensaver that I have created (and used as an example here) consists of wallpapers downloaded from http://hubblesite.org/gallery/wallpaper/ .

OK, let’s get cracking! I have prepared a template for the deb package – start with downloading it:

screensaver-template.tar.gz

and extracting it somewhere in your home directory (tar -zxf screensaver-template.tar.gz).

Now it’s time to add some photos – create a directory inside screensaver-template with the name of your choice. I have put my images in screensaver-template/hubble but you should choose a different name. Copy all the images inside your directory, I’m assuming those will be *jpg files.

gnome-screensaver requires XML file that describes your images – you will find a script inside my package that create the xml file for you: copy create-xml.sh inside your directory with pictures and run it. It will generate background-1.xml file. Have a look inside – it’s pretty straight forward. It assumes that all your images will go into /usr/share/backgrounds/<YOUR_DIR>/. Remove create-xml.sh from your directory – we won’t need it there.

gnome-screensaver also uses .desktop files to manage available screensavers. This file allows you to see your screensaver (it’s acually called screensaver theme) in “Screensaver Preferences”. There is ready to edit file in the template called “hubble-slideshow.desktop”. First rename it to “<YOUR_DIR>-slideshow.desktop” – replace <YOUR_DIR> with the same name as your directory for consistency. Edit the file, you will need to change 3 lines:

  • Name – put a short name of your screensaver theme. This will be visible in “Screensaver Preferences”.
  • Comment – description
  • Exec – here change the path after –location-. It will need to match the path used in the XML file, so it will be –location=/usr/share/backgrounds/<YOUR_DIR>

Now it’s time to create Debian/Ubuntu package, go into debian directory and edit following file:

  • README – put general information about your screensaver there
  • changelog – edit changelog information: change package name, add anny comment if you with and change the signature. Keep the format of this file as in the template!
  • control – change “Source:” and “Package:” lines with the name of your package. Also edit “Maintainer:”, “Homepage:” and “Description:”
  • copyright – put all copyright information there
  • install – here we are telling package manager that it needs to install two things:
    • <YOUR_DIR> into usr/share/backgrounds – rename “hubble” on this line to your directory name
    • .desktop file should go into usr/share/applications/screensavers – rename hubble-slideshow.desktop to <YOUR_DIR>-slideshow.desktop

Go up from “debian” directory and run command:

% dpkg-buildpackage

That’s it!! You will find you package in the directory above named gnome-screensaver-<YOUR_DIR>_0.1_all.deb – install it just like any other package and enjoy your new theme!
Here is the screensaver theme I have created:

gnome-screensaver-hubble_0.1_all.deb

It’s nearly 50MB package with 81 images from Hubbe site – enjoy!


1. Generate your SSH key. Leave passphrase empty (simply press enter):

ssh-keygen

2. Copy the key to the server where you want to login without using password authentication:

ssh-copy-id user@host.name.com

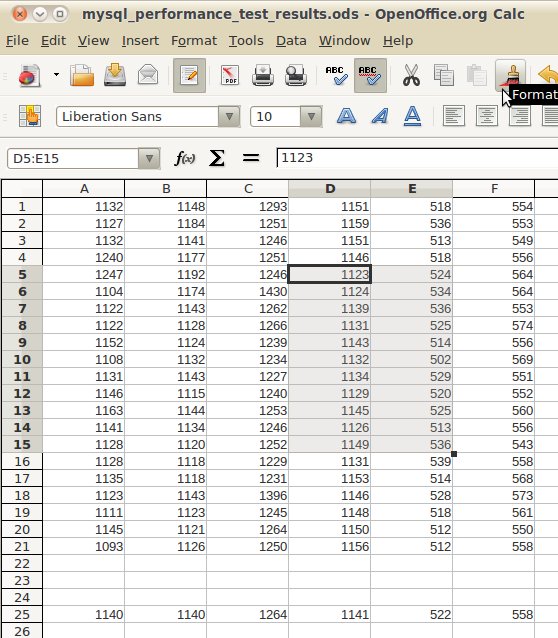
With my new Ubuntu 10.04 came new version of Open Office. One annoyance that has bothered me was too bright and not very visible selection area in OO calc (and writer as well). On my monitor the selection is barely visible and doesn’t contrast with the background:

calc_selection

As it turns out, this was a common complain among the users and has been fixed by adding new option, see OO bug report. The fix:

  1. Select Tools -> Options from the menu.
  2. Expand “OpenOffice.org” section and click on “View”.
  3. Decrease the percentage of “Transparency” or disable it altogether.

An interesting error that may happen in PostgreSQL when using prepared statements is:

ERROR: cached plan must not change result type

This may happen when:

  1. A prepared statement is prepared on the server
  2. The tables structure is changed in a way that the result of the prepared statement will change
  3. Prepared statement is executed

Let’s try to reproduce it:

CREATE TABLE phonebook(phone INT);
PREPARE prepsel (INT) AS SELECT * FROM phonebook WHERE phone = $1;
EXECUTE prepsel(1); --all OK here
ALTER TABLE phonebook ADD COLUMN a INT;
EXECUTE prepsel(1);
ERROR:  cached plan must NOT CHANGE RESULT TYPE

The possible solution are:

  1. Re-create the statement, so it will use up-to-date table definition
  2. Stop your application or cause it to drop the database connection otherwise. Prepared statements are allocated per-session.
  3. Change the prepared statement to use minimum columns used, e.g. change SELECT * to SELECT id. This way, only if “id” column changes your statement will become invalid.

Sometimes it’s a good idea to intercept the SQL queries exactly as they are generated by your Java application. One way to do it (in MySQL) is to enable general_log. Another really handy option is to use MySQL JDBC driver option: autoGenerateTestcaseScript. It will dump all the queries to standard error, as they are being sent to the database.

com.mysql.jdbc.jdbc2.optional.MysqlDataSource ds = new com.mysql.jdbc.jdbc2.optional.MysqlDataSource();
ds.setAutoGenerateTestcaseScript(true);
ds.setURL("jdbc:mysql://host:port/dbname");
Connection con = ds.getConnection("user", "password");
//...

This will give you on your stderr output like this:

<p>
<br>
/* conn id 384 */ SELECT * FROM user WHERE id = 2;<br>
/* conn id 384 */ SELECT * FROM user WHERE id = 1;<br>

</p>

PHP provides a handy support for System V IPC functions in the Semaphore module. Let’s have a look at the functions responsible for handling shared memory. They can be used to implement a simple way of exchanging information between the processes.
To see if your PHP installation supports IPC, run:

% php -i | grep sysv

If PHP was compiled with –enable-sysvmsg you should see something like this:

sysvmsg
sysvmsg support => enabled
sysvsem
sysvshm

To actually user the shared memory we will:

  • Initialize shared memory with a size and a key. The key will be used as identifier of our shared memory block.
  • Store a variable in the shared memory. We will use another key to identify our variable within shared memory.
  • Read from shared memory and destroy it

I’m using CLI interface for all the examples below. The code:

define('SHMEM_KEY',0x12345);
define('VARIABLE_KEY',1);
 
$my_array = array(1,2,3);
 
$shm_id = shm_attach(SHMEM_KEY, 512);
if (!$shm_id) {
    echo "Failed to attach shared memory.\n";
}
 
if (!shm_put_var($shm_id, VARIABLE_KEY, $my_array)) {
    echo "Failed to put variable in shared memory $shm_id.\n";
}
 
$restored = shm_get_var($shm_id, VARIABLE_KEY);
print_r($restored);

Call to shm_attach above creates shared memory identified by number 0×12345 of the size of 512 bytes. It returns a handle that you then can use to operate on the shared memory. The handle is a resource of type sysvshm.
In the example above I did not destroy (remove) the shared memory. It means that it should stay on your system even after the script finishes. To “see” it on Linux you can use ipcs command:

% ipcs
 
------ Shared Memory Segments --------
key        shmid      owner      perms      bytes      nattch     status      
0x00000000 0          root       777        135168     1                       
[...]
0x00012345 3440670    zabuch     666        512        0             
[...]

Pay attention to the perms column. The default value (666) means that all other processes running on the same machine have read/write access the shared memory you just created.
Finally, use shm_remove($shm_id) to free the memory. All data will be destroyed.


How to download a list of URLs using more than one process (say wget) at the time?
First, create a file with URLs – one URL per line. Let’s call the file url.txt. Then we need to create N wget processes, each downloading one URL at the time. Thanks to xargs it is trivial:

cat url.txt | xargs -n 1 -P 10 wget

-n 1 will make xargs run command (wget) with only one argument at the time
-P 10 will create 10 parallel processes


Drupal views 2 API allows creating views based on any table. Most of the fields you will be displaying will be based on the table columns but it may sometimes be handy to create a non-database field. Usually it will be a field that you need to compute – maybe based on some other fields from the same table. The point is that the field name will not map to the table’s column name.

I will illustrate it on the example below. Let’s say we have a very simple table named distros that hold Linux-based distributions with just 2 columns:

  • id – the primary key
  • name – name of the distribution

I have created a new module called distros with two files:

  • distros.module with function distros_views_api
  • distros.views.inc

In distros.views.inc we need to describe our table – it’s easy for the table columns like name:

function distros_views_data() {
  $data = array();
  $data['distros']['table'] = array(
    'group' => 'distros',
    'title' => 'title',
    'help' => 'help'
  );
  $data['distros']['table']['base'] = array(
    'field' => 'id',
    'title' => 'Distro',
    'help' => 'This is distro main table',
  );
  $data['distros']['name'] = array(
  'field' => array(
    'title' => 'distro name',
    'help' => 'This is distro main table',
  ),
  );
  return $data;
}

To add non-database field, we will need a custom field handler. Otherwise Drupal will try to add field name into SELECT clause it’s using – that will obviously cause an error as the column doesn’t exist. Let’s say we want our view to display a quote from Linus Torvalds. Our new, “virtual” field should be named quote and should always display a text: Talk is cheap. Show me the code. We will call our handler distros_handler_field_distro_quote and overwrite two functions:</p>

  • render – to always display our text
  • query – to prevent Drupal from querying for quote field

In distros_handler_field_distro_quote.inc :

<?php
class distros_handler_field_distro_quote extends views_handler_field {
  function render() {
    return "Talk is cheap. Show me the code.";
  }
  function query() {
    ensure_my_table();
    $this->add_additional_fields();
  }
}

Now, let’s go back to distros.views.inc and register our new handler:

function distros_views_handlers() {
  return array(
    'info' => array(
      'path' => drupal_get_path('module', 'distros'),
    ),
  'handlers' => array(
    'distros_handler_field_distro_quote' => array(
      'parent' => 'views_handler_field',
    ),
  ),
);
}

And finally describe new field by adding to distros_views_data:

$data['distros']['quote'] = array(
  'field' => array(
    'title' => 'Quote from Linus',
    'help' => 'This is non-database field',
    'handler' => 'distros_handler_field_distro_quote',
  ),
);

Install your new module and create the view, here is the final effect:

Download the full source code if you wish.


To upgrade nearly all packages with apt-get but “hold” some of them at the current version, you can use dpkg.
Let’s say I would like to upgrade my Debian or Ubuntu system with apt-get and here is what I’m getting:

% sudo apt-get upgrade

[...]

apt apt-transport-https apt-utils ghostscript ghostscript-cups ghostscript-x google-chrome-beta hal indicator-applet
nvidia-current-modaliases php-pear php5 php5-cli

If I don’t want to upgrade php5 package I can “hold” it:

  1. Switch to root (su or sudo -s)
  2. Execute:
echo php5 hold | sudo dpkg --set-selections

That’s it – after running apt-get upgrade again, the package will be “kept back”:

% sudo apt-get upgrade
Reading package lists... Done
Building dependency tree
Reading state information... Done
The following packages have been kept back:
php5

To make the package installable again:

echo php5 hold | sudo dpkg --set-selections

I needed to set my Apache Web Server to ignore/block all the HEAD requests but respond to GET requests normally. It is very simple with the mod_rewrite, for instance this can be added to .htaccess:

RewriteEngine   On
RewriteCond     %{REQUEST_METHOD} HEAD
RewriteRule     ^.*$    - [F]

Second line:

RewriteCond     %{REQUEST_METHOD} HEAD

matches all requests that use method HEAD.

Third line:

RewriteRule     ^.*$    - [F]

tells Apache HTTP not to make any redirection (-) and sends back HTTP 403 (FORBIDDEN).